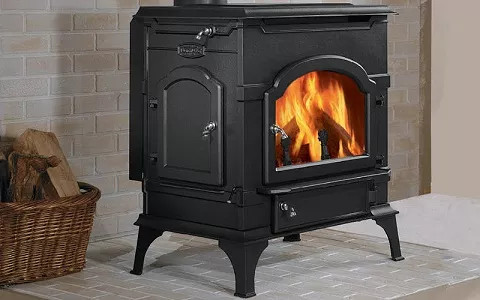
Installing a wood-burning stove can be very simple and can be done in no time at all. All it takes is a few easy-to-follow steps to get your stove up and running flawlessly. Although it can be a relatively straightforward task, if you don’t have the proper infrastructure in place (hearth, venting, etc.), it can be a fairly daunting task that requires a significant time investment. Read on for more information about how to install a wood-burning stove.
“A wood-burning stove warms you twice—once when you cut the wood, and again when you sit beside the fire.” – Traditional Proverb
Before we get to the tutorial, be aware of one of the best-kept secrets at PlumbersStock. We offer lots of discount fireplace options, as well as parts and hearth accessories. You just have to be logged in to see them. Once logged in, you will see a lot more fireplace products here.
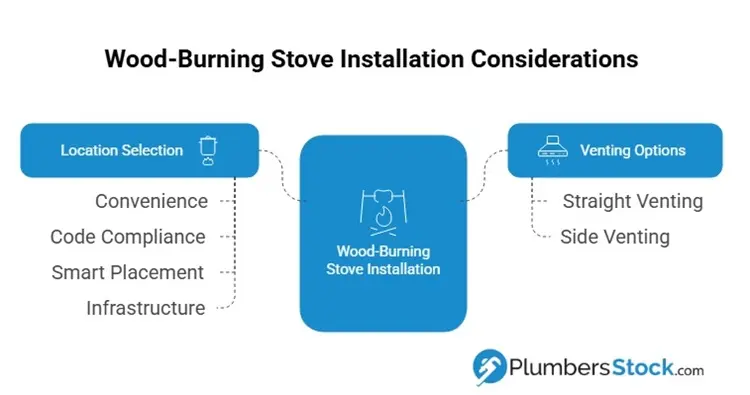
Find a Proper Location for Your Stove
This step is very important. You not only want to find a place in your home where your stove will look good, but you have more to mind than that. Here are some things to consider while you are looking for a proper location for your wood-burning stove.
- Is it a Convenient Place to Haul Wood? When selecting a location for your stove, consider the distance you will need to haul the wood. You want to avoid placing it somewhere that will force you to haul wood throughout your entire house. Pick a location that you can easily access from the outside.
- Does it Meet Code? If you have never installed a wood-burning stove before, it is essential to familiarize yourself with the applicable building codes. Keeping up to code typically requires certain measures, like spacing your stove a certain distance from the wall. You will also need to consider potential fire hazards. Ensure you review the building codes before installing your stove.
- Is it a Smart Location? Did you know that warm air rises? If you are looking to heat your entire house with your stove, it would be smart to place your stove in a location that is in a basement or on the main level. This will help the hot air to rise and heat your house properly. Also, a central location is recommended. If you cannot place your wood-burning stove in a central location, consider adding a blower or fan attachment to your stove. This will help with air circulation and help to push that warm air into the rest of the home.
- Infrastructure? Another thing to consider is a hearth of some kind. Wood-burning stoves produce ash and sometimes sparks, which are a leading cause of house fires. Installing a hearth under your fireplace will help reduce the risk by removing the flammable carpet or vinyl under and around the stove and replacing it with a non-flammable pad. You can pick up an easy solution for around $200 online that wouldn’t require any masonry installation experience.
Venting Your Wood-Burning Stove
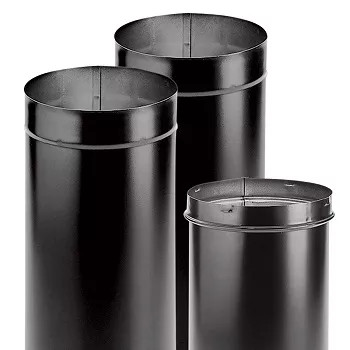
You cannot install a wood-burning stove in your home without a chimney. It has to be a chimney that meets building code requirements as well. You can’t just install a stove with metal piping going out the window. You have to use a UL-approved Stainless Steel Class “A” insulated chimney or a sound masonry chimney. Here are some of the ways you can install a chimney in your home.
There are 2 basic ways to vent a wood-burning stove, (1) straight up and out the ceiling or (2) out the wall and along the side of the house. There are pros and cons to either choice. But there are some common denominators to both.
- You will need a ceiling box. This is a Metal fitting that will transition from your stove pipe to the triple-wall pipe needed outside the home.
- You will also need, in both instances, a black single-wall stove pipe and a damper.
Because a large amount of heat goes up the chimney, using a single wall stove pipe (to the ceiling box) and a damper is the best way to channel this heat.
Straight Venting Configuration
Venting a Chimney Straight up through the ceiling is the quickest route to vent your stove and maybe the least expensive. Once you vent your stove pipe up to the ceiling box, you need to start using a triple-wall pipe to finish the chimney. The triple-wall pipe is designed for wood stoves.
It comes in different lengths, measured in 1-foot increments. It can vent through the roof with the least amount of clearance possible. Check your local code, but most locations only require 1-2 inches of clearance between the triple-wall pipe and any flammable material. This means smaller holes to cut and more surfaces to utilize with your roof jack. Your roof jack is the next part of your Chimney. This part is tricky, and you might want to talk to a roofer for tips, but it is essential. A roof jack keeps water out of your house, helps to hold the chimney pipe upright, and helps to support the pipe during windstorms.
Finally, you will need a vented top. Once you have vented your triple wall chimney pipe to the proper length (again, check your local code but typically 4’ away from your roof. You’ll need to compensate for your roof pitch to double-check the distance), you’ll need to top it off with a vented top. Vent tops are designed to keep the bigger sparks from blowing into the air and keep moisture and critters from getting in. If you are using wood with a lot of pitch, you will need to keep an eye on the screen surrounding your vent top. It tends to clog up with creosote. If this happens, it will not vent the smoke properly and also become a fire hazard.
Side Venting Configuration
What if you decide not to mess with cutting holes in your ceiling and roof? Your other option is to vent your stove out the side. First, vent your black stove pipe out the side of your home and into your transition box. Then do one of two things.
- Triple-wall pipe up the side of your home, or
- A masonry chimney out of brick.
Masonry Chimney
The masonry chimney gives a classic look and feel to your home. If you know how to lay it, it can be relatively inexpensive.
Triple-Wall Pipe
 You will probably want to stick with the triple-wall pipe idea if bricklaying is not your thing. It can be boxed in and then sided or stuccoed to match your current exterior. It is fairly simple to run a triple-wall pipe, but it can be quite expensive at around $80 a foot.
As mentioned earlier, you will need to pipe above the roof and use a vented top, so be sure to factor those considerations in as well. Wall straps are a requirement for installing triple walls outside your home. These clamp onto the pipe to hold it fast and screw to the wall of the house for stability. A typical wall strap for an 8-inch triple-wall pipe runs about $20 online and should be installed about every 5 feet or so.
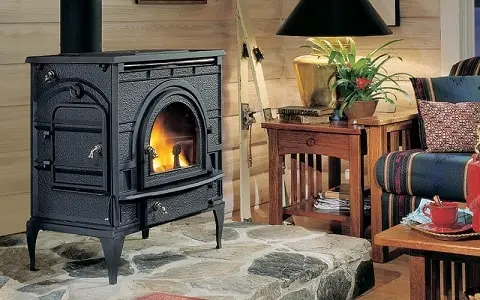
It might sound daunting to contemplate all this, but once it is installed, a wood-burning stove could be your saving grace on those cold winter nights, and the security you will feel when you’re done will be worth all the work and effort you spend. Building a chimney is a crucial step in installing a wood-burning stove.
Installing Your Wood-Burning Stove
Once you have identified a suitable location and ensured your chimney is up to code, you can then install your wood-burning stove. This particular step is pretty simple, though arduous, because you are dealing with a heavy object. You must place your stove in the desired location and ensure that all the metal heating tubes are connected correctly. Be sure to follow your owner’s manual, which comes with the stove, to ensure you aren’t missing any steps. Once you have done this, you are then ready to use your new stove.
If your home doesn’t already have a built-in chimney for your wood-burning stove, ensure you are aware of all the regulations. Consider the chimney installation requirements before you begin the process. This is wise, not only for legal but also for insurance reasons.
Keeping Your Family Safe from Fire Hazards
A wood-burning stove can be a lot of fun. It brings warmth and comfort to a home on a cold winter’s night. It is a great place for the family to gather. By doing your part to install your stove correctly, you are taking the steps needed to keep you and your loved ones safe and out of harm’s way. Always double-check to ensure your wood-burning stove meets construction code requirements after installation. Thank you for reading about how to install a wood-burning stove.
“Every man looks at his woodpile with a kind of affection.” – Henry David Thoreau, Walden
Related resources:
Video: Complete Guide
Benefits of a Wood-Fired Stove
About the Author
Nathan is a product expert and has worked for PlumbersStock since 2012. Like many in the company, he's a graduate of Southern Utah University. He enjoys spending time with his family, the gym, being in the mountains, reading, movies, music, watching sports, and playing CoD online with his little brother.
