If you are in the market for a new dryer and want to do the installation yourself, realize that there are two significant components to the installation:
- Installing a dryer vent
- Hooking up the dryer vent hose
There is a good chance the first one has already been done for you. If you are replacing a dryer, then you connect the new dryer to the existing vent. If it’s an old home that has never had a dryer, you will have to learn how to install a dryer vent. We’ll cover that later.
How to Hook Up a Dryer Vent Hose

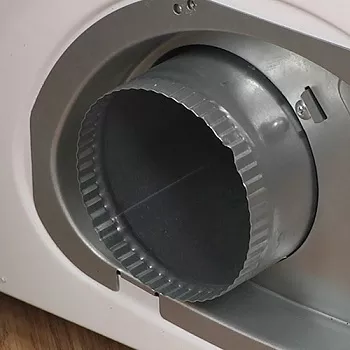
- Locate the port on the back of the dryer.
- Locate the vent port in the laundry room wall.
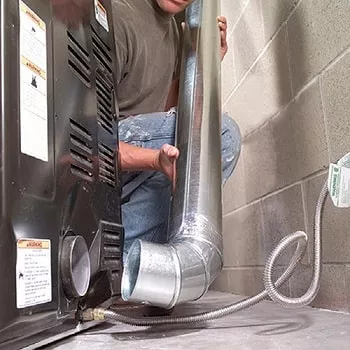
- Connect the two using a flexible duct.
- Secure the flex duct to each port with a circular duct clamp.
- Push the dryer into place. As you position the dryer, take care to avoid pinching the flex duct.
Tips for Installing Dryer Vent
The easiest way to vent is through an exterior wall. With just a few inches of rigid duct and a vent hood, you can complete the installation. If an immediate exterior wall is not an option for you, you will have to vent through multiple rooms or the roof. Some rules to live by:
- Do not run more than 25 feet of dryer duct. For every 90-degree turn in the duct path, subtract 5 feet from that maximum. For every 45-degree turn, subtract 2-1/2 feet.
- A 4-inch rigid duct is the standard.
- Don’t use sheet metal screws because they are a fire hazard (they snag lint). Use foil duct tape to seal the duct.
- The vent hood must be at least 1 foot off the ground outside.
How to Install Dryer Vent
For the sake of simplicity, we’ll cover this installation as if your dryer is installed against an exterior wall.
Determine where to cut duct location
- Using the vent pipe, mark a circle where the hole will be drilled from the inside.
- Before cutting it out, using a ¼-inch pilot, drill a test hole at the dead center of the circle.
- Now, go outside and check the hole from the outside. Use the vent cap to make sure it’s in a good location.
- If you don’t like the location, move the vent cap to where you want it, measure the distance from the hole to where you want the center to be, and then use that measurement to drill a new center hole inside.
Cut out duct hole
If you are cutting through a finished wall before drilling all the way through, make sure there is no plumbing or electrical wiring behind the drywall. If you are cutting through brick or stucco or something like that, then you need a hammer drill and a masonry bit for the job.
- With a 4-1/4-inch hole saw, cut the duct opening from the inside.
- Once you feel that the hole saw pilot bit has popped through to the exterior, go outside to finish.
- Finishing the hole from the opposite side will help make a smoother opening and minimize uneven splintering on the home’s exterior.
Install the Ductwork and Vent Cap/Hood

- From outside, insert the vent hood duct pipe through the hole you just drilled.
- Position the hood so that it vents downward and secure it in place with screws or anchors.
- Caulk all around (except the bottom, so moisture can escape) the hood to seal it. Make sure the caulk is graded for outdoor use.
- Go inside and check your work. You may be close to done. If the height of the duct is convenient for connecting your flexible duct, then connect it and be done. If the duct is high up on the wall, you’re going to need to use a rigid duct (elbows and straight pipe) to bring it down to the dryer’s level. When connecting ductwork, put the crimped end into the duct above it to minimize exhaust escaping.
- If necessary, secure the ductwork in place with straps and supports and the duct connections with foil tape.
Save on HVAC Solutions with PlumbersStock
That's it! Now you know how to install a dryer vent, and knowing is half the battle. Please leave your comments and questions. Remember, we have all kinds of replacement HVAC parts for your heating and cooling system.
Related resources:
Duct Reduction Tutorial
How to Connect Ductwork
How to Install a Bathroom Exhaust Fan
How to Install a Diffuser


