

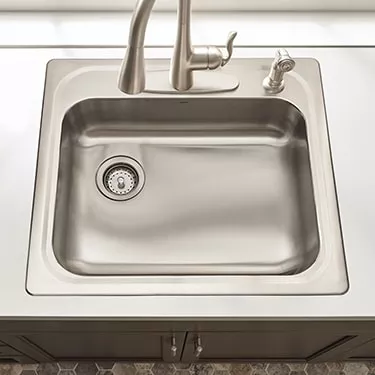
If you are looking to learn how to install a drop-in sink, you have come to the right place. Often referred to as self-rimming, the basic principles are the same, whether you're working with a drop-in lavatory sink or if it's a new drop-in kitchen sink install.
On the surface, it may seem like an intimidating project, but it is actually something most homeowners can do themselves. It may take you a little time to configure, but this is one of the easiest sink installations you can attempt. Drop-in sinks are very practical and they look great, which is why they are so popular.
Preparing for Your Installation
It is important to know what kind of sink, plumbing tools, and materials you will need before you begin your install. There are a few important things you can do to prepare your sink before you install it into your countertop.
- In many cases, it is easier to install the faucets onto the sink before you actually insert it into your countertop.
- If the drain doesn't properly line up with your new sink you will need to purchase some 95 and 45-degree elbows and straight pipe to make the connection work.
- If you will be placing your drop-in sink onto a marble countertop, you will want to purchase silicone caulk instead of plumber's putty as it can discolor marble.
- In many cases, drop-in sinks can be heavy, so having a friend or family member help you with the install is always a good idea.
- Always use protective gear like safety glasses.
- PVC traps are much easier to work with than chrome pipes when you are trying to connect drain pipe.
- It's always a good idea to have everything you will need in your work area before you begin so you don't waste time trying to find tools around the house.
7 Steps to Self-Rimming Sink Installation
- Cut Out or Have Someone Cut Out Your Countertop Hole - To place a drop-in sink into your countertop you will need a hole made. If you don't know what you are doing, it might be a good idea to just have someone cut the hole for you to make your install that much easier.
- Make Sure Sink Fits in Countertop Hole - Before placing caulk or anything else onto your countertop you will want to make sure you sink fits in the hole properly by "dropping" it into place. Once you have identified that it does you can then begin the install process.
- Apply Caulk - Use your caulk gun to apply caulk all the way around the hole in the countertop where the rim of the sink will sit.
- Insert Sink into Opening - Once you have caulked all the way around the opening you can then place the sink into the hole. Once you have your sink positioned properly in place you can then apply caulk all the way around the rim between the sink and the countertop.
- Make Sure Sink is Positioned Perfectly in Place - Once you have your caulking all the way around your sink you will want to make sure everything is in perfect position by feeling around with your hands and pressing out any imperfections.
- Install Fixtures - Once you have made absolutely certain that your sink is perfect you can then install the fixtures (unless you installed sink with fixtures intact) into place and clean up any extra caulk which is on the counter.
- Enjoy Your New Sink - Once you have completed installing the fixtures and removing excess caulk it is then time to enjoy your new drop-in sink!

Drop-in sinks can get pretty worn or out of date over time. All it takes is a few easy steps to give your sink the remodel it needs. Discover just how easy and inexpensive installing a sink is. No matter what kind of install you have, we've got a huge selection of sink parts, so save online with PlumbersStock.
Related Resources:
Installing an Undermount Sink in Granite
How to Install a P Trap
Installing a Single Hole Kitchen Faucet
Replacing a Lavatory Faucet
Installing an InSinkErator