

When installing a new water heater, it's easiest if you're dealing with a job that doesn't require soldering. You can usually connect your water heater to a plastic pipe with flex connections (at least 18" of length will prevent the plastic pipes from overheating). In those cases where you need to know how to solder a water heater connection, here is a tutorial to help you understand the process.
Things to Know
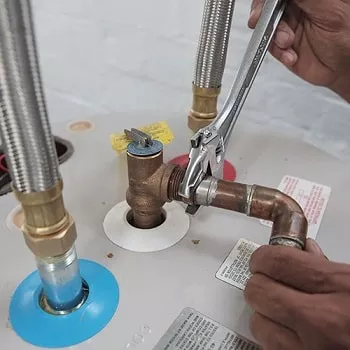
When using galvanized nipples to connect your heater to copper or brass, a dielectric union is required to prevent galvanic corrosion, a corrosive reaction created through acidic electrolysis. This corrosion leads to weak and faulty connections. A more straightforward solution would be to thread a "water flex" to the nipples coming from the water heater inlet and outlet. These flexible supply lines are created to isolate the corrosive reaction, eliminating the need for a dielectric union. The other end can come in either another threaded connection or a solder connection, depending on your application.
Soldering Pipe takes some practice, but following a few simple rules will help to make your weld leak-free.
- Clean your connections and pipe inside and out (try emery cloth and wire brushes).
- Use flux on both the inside of the fitting and the outside of the pipe.
- Don't turn your torch too high.
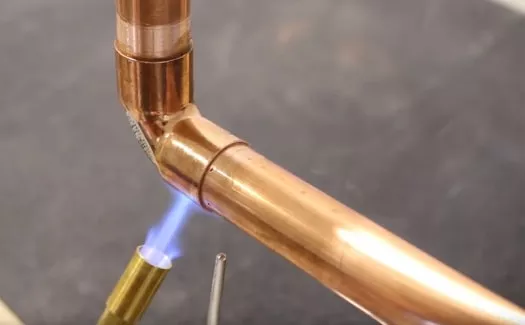
- Heat the fitting, not the pipe. This action will "draw" the solder into the fitting (it's pretty cool to watch).
- Have a water bottle spritzer handy.
Soldering Water Heater Pipes in 8 Steps
Now that you've got a clean pipe and fitting, you're ready to get to work:
- Apply a nice coating of flux to both pieces and slide together.
- Unroll about 12" of solder from the roll and bend the end to form a hook shape, leaving about 10" between you and the end.
- Turn on your torch, be careful of your surroundings, adjust your torch settings to a medium flow. Because soldering works best with consistent heat, the area behind your fitting will get hot enough to burn. If you are soldering close to combustible materials, use a heat cloth behind your fitting to prevent catching things on fire.
- Point your flame at the fitting side of your connection until about 1/4 of the flame's length is on the fitting.
- Place the end of the solder that you previously bent on the backside of the pipe right where the fitting and the pipe meet.
- Once the fitting becomes hot enough, the end of your solder will liquify and draw into the fitting. As soon as this happens, slide the end of the solder around the pipe.
- Spritz it with water (when complete) for a quick cool down and shut off your torch.
- Once all of your fittings have been soldered, turn on your water and check for leaks. If leaks are apparent, repeat steps 4-9
Note: a pipe with water inside it will not heat up enough to solder. If water is still present, take some bread crust and stuff it in the pipe. The bread should soak up the water long enough to solder your connection. Remember to remove the aerator from your faucet before turning it on, or it will fill with soft bread.
Solder with Confidence
Now that you know what's required, shop and save on the best soldering supplies here at PlumbersStock. We have great brands for whatever you need, including Bradford White. If you have any remaining questions about soldering water heater pipes, please do not hesitate to contact us.
Related resources:
How to Install a Gas Water Heater
How to Install an Electric Water Heater
How to Wire a Hot Water Heater
How to Install a Water Heater Expansion Tank